|
Introduction
My daughter is learning to play piano and needed a
foot rest to help her be comfortable and maintain good
posture. She is only 5 years old and her feet do not yet touch
the floor when she is sitting at the piano. The foot rest
gives her a place to put her feet and will adjust as she grows.
The footrest has to be adjustable so that we can
lower it as she grows and her legs get longer. It also must
fit over the piano pedals.
Maple seemed like a nice material for my foot
rest. It is a pretty hardwood, and costs a little less than
oak. Any 3/4" lumber can be used for the project.
It can even be built out of plywood.
The foot rest can be painted, but I am using polyurethane.
Materials
I purchased about 8' of 1 x 12 maple. For some
reason, it is not really 1 x 12, but actually 3/4" by about 11
1/4". That works out just fine for this project.
Tip: The piece I bought was not precisely 11
1/4" wide. One end was slightly wider than the
other. If I had cut the pieces the other way, I might have run
into trouble, but because of the order I cut the pieces, everything
worked out fine. Be sure to measure the lumber you buy to make
sure it is the size you intended.
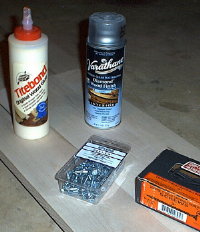
Materials List:
(1) 7' x 12" x 3/4" piece of lumber
(1) box of 1 1/4" wood screws
(10) 3" wood screws
Can of spray polyurethane
Carpenters Wood Glue
(1) Small finishing nail (not shown) |
 |
Tools
This project requires basic carpentry tools. Many of the
cuts must be very accurate, so a table saw or radial arm saw is
required. I recently purchased an inexpensive table saw that
was perfectly adequate for the job. The rest of the tools can
be found in most any basement or garage.
|
Tools List:
Table Saw
Drill for drilling holes and driving screws
1/8" drill bit
1/4" drill bit
Pencil
Angle
Measuring tape
Sand paper
Power sander or sanding blocks
Beer ;-)
|
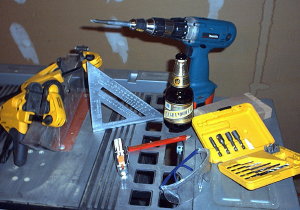
Not shown:
Power Sander
Jig Saw
Nail Punch
|
Cutting the Pieces
The diagram below shows the lumber split into 7 types of pieces labeled
A through G.
Everything can be cut from a single 8' piece of
wood. The following diagram shows how to cut the lumber.
Be sure to cut one piece at a time because this diagram does not
take the width of the saw into account! Measure each piece,
and then cut. Then measure again from the cut edge. A
and B and D and E should be identical. You can use one as the
template for the next. Same goes for the cleats and the
blocks. Use the first as a template to get all the pieces
exactly the same size.
Cutting Order from
one piece of 1x12 maple:
Cutting Steps:
It is hard to work with a piece of wood this long, so the first step
is to cut it in two. Make your first cut about 40" from
the end. This will put you between parts C and D, and give you
two manageable pieces of wood.
Next, cut A, B and C from the 40" piece.
Label the pieces and show which way is up. This is especially
important with A and B because they are almost square.
D and E are next. D will need to slide into the box, so it
should be just a bit smaller than E. If the pieces are not
identical, make the smaller one D.
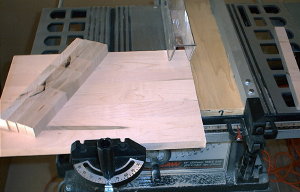
The cleats (F) should all be exactly the same size.
Fortunately, there is an easy way to do this by using the fence on
your table saw. First, measure 1" off the end of
your lumber, and line it up with the saw blade. Take a small
piece of scrap wood (I used one about 3" wide) and set it just
to the right of your lumber. Then place the fence just to the
right of your scrap wood. Now you can make 10 identical cuts
by pushing your lumber against the scrap wood as shown below:
Cutting cleats on
the table saw:
You can do the same with your blocks (G). Cut
a 2" piece of wood, and use the same setup to cut 1 1/2"
sections from it.
A and B are the two sides of the box. Each has
a cut-out on the bottom which is simply for appearance.
The cut-out should be 1 1/2" high. The legs come off at a
45 degree angle. The two pieces are identical except that they will face each
other. Be sure to mark which side points towards the front on
each. You cannot use the table saw to cut out the legs because
the blade is too big. Use a jig saw instead. The cut
will not be as clean as from the table saw, but sanding will take
out the rough edges and make it look good.
A & B: Left and
Right Side Panels:
C is the back. It has an 8" wide cut-out
for the piano pedals. Make sure that it will fit over the
pedals on your piano! My pedals are about 7 1/2" wide and
2 1/2" high, so I left about an extra half an inch. As
with A and B, you will need to use a jig saw to make the cuts.
The piece is color coded in red throughout all the diagrams. The back holds the entire project
together. The sides and the bottom are attached to the back
with wood screws.
C: Back Panel:
D and E are the adjustable shelf and the bottom
panel. They are the same size, except the bottom has a cut-out
for the pedals. It sits 2 inches off the ground, so it would
otherwise hit my 2 1/2" high pedals. They are colored green and
pink for easy identification in later diagrams. They are both
14 1/2" wide, so that with the two 3/4" sides the width of
the entire unit becomes 16". The 11 1/4" depth will
touch the back, so the whole unit will be 12" deep counting
the width of the back panel.
D & E: Shelf
and Bottom Panel:
F are the ten cleats (five on each side) on which
the shelf slides. They form the five adjustable positions for
the shelf. Each one is 1" wide and 11 1/4" long.
They are attached to the inside of the left and right sides of the
box. Screws and glue hold them on.
F: Cleats (10):
G is the last of the parts. These are four
blocks which are attached to the sides on the very bottom.
They are screwed and glued to the sides and support the weight of
the bottom panel. The panel is screwed to the blocks from the
top to avoid making screw holes on the outside of the
sides. The blocks are 1 1/2" high and 2 inches
deep.
G: Blocks to hold
bottom panel (4):
Drilling Holes
You will need to drill a hole for each screw that
you will be putting in to avoid splitting the wood. You should use a bit smaller than the
screw - probably about 1/8" inch to drill each hole.
Holes for the 1 1/4" screws should be about 1" deep.
For the 3" screws, drill to about 2 1/2". The easiest way
to make sure you don't drill too deep is to wrap a piece of tape
around your drill bit at the deepest point you want the bit to
go. Once the tape touches the wood, you know that you have
gone far enough.
All your screws should be counter sunk to get them
below the surface of the wood. This makes the project look
nicer, makes it easier to sand, and gives you the option of filling
the holes with wood filler to hide the screws . Take a 1/4" drill
bit and drill just a little into each
hole. This will allow you to drive the head of the screw below the surface
of the wood.
Assembly
Side A:
Build each side first. The cleats should be
identical on both sides, and the gap between each set of cleats must
be just a little more than 3/4" to accommodate the width of the
shelf. Use some of the leftover scrap wood to make 10 small
pieces of scrap wood. Lay out all the pieces as shown,
using scraps to represent the position of the bottom panel.
Use a scrap piece and a penny in between each cleat. The penny
makes the gap just wide enough so the shelf will slide easily.
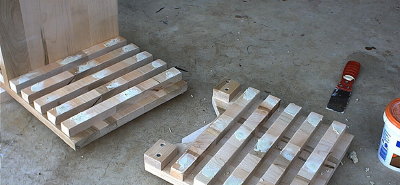
Side view:
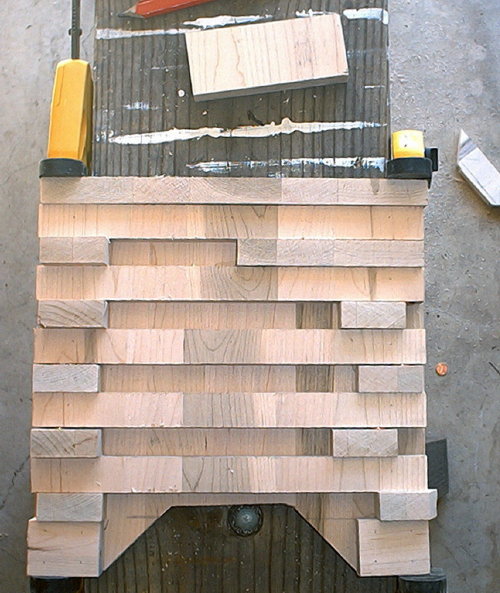
The picture below shows the arrangement described
above with the scrap wood and the pennies. Notice that clamps
hold everything together to keep it all from moving while you are
drilling the holes. You can just see the pennies in the
picture.
Cleat and block
arrangement:
Once the cleats are spaced perfectly and clamped, measure and drill the
holes, two in each block and three per cleat. Screw in the
blocks but not the cleats. Take them off, but be sure to keep
them in the same order so you can put them back exactly where they
were before. Now, attach the bottom to side A by drilling
holes and screwing the bottom to the blocks with two screws.
Now, you can attach the cleats.
Side B:
This side is a mirror image of side A. The
only difference is that you do not need to attach the bottom.
It will fit in later in one of the last steps.
Finishing Before Assembly
This is a good time to finish the inside of the
sides as they will be hard to reach later. First, use wood
filler to hide the heads of the screws. Start by filling it in
with a putty knife and letting it dry:
Wood filler drying
in screw holes:
Then, sand off the excess filler, and sand all edges
smooth. Apply polyurethane to the cleats at this time because
it will be much harder once everything is assembled.
Back and Bottom:
You can now attach the two sides together. The
bottom is attached to side A and should slide in between the blocks
and the lower cleat on side B. Do not attach the bottom to
side B yet.
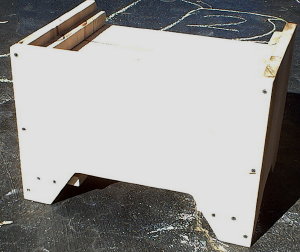
Front view:
The next step is to attach the back. Make sure
the back fits perfectly. Since side B is not yet attached, you
should be able to move everything around to fit. Do not drill
all the holes at once. Drill one hole at a time and put
in a screw before going on to the next hole. This will give
you the opportunity to get everything lined up incrementally.
Use three screws to attach each side to the back, and four screws to
attach the bottom to the back as shown below:
Approximate screw
locations on the back panel:
Measure carefully so that your holes do not poke
through the other side. Use the longer 2 1/2" screws to
make sure the back is attached securely. Once the back is on, your foot rest is completely put
together!
Side B is still not attached to the bottom.
They are both attached to the back panel, so nothing needs to be
done from the back, but you should hammer in a finishing nail from
the outside of the box through panel B into the bottom panel.
Use a nail set to force the head of the nail below the surface of
the wood, and fill with wood filler.
Top view:
Finishing
Sand the entire project to smooth out the
edges. Sand all surfaces so that the polyurethane will adhere
and make a nice smooth surface. Spray on the polyurethane and
allow to dry. Sand again with a fine grit sand paper and put
on a second coat of poly for a smooth finish.
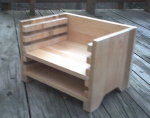
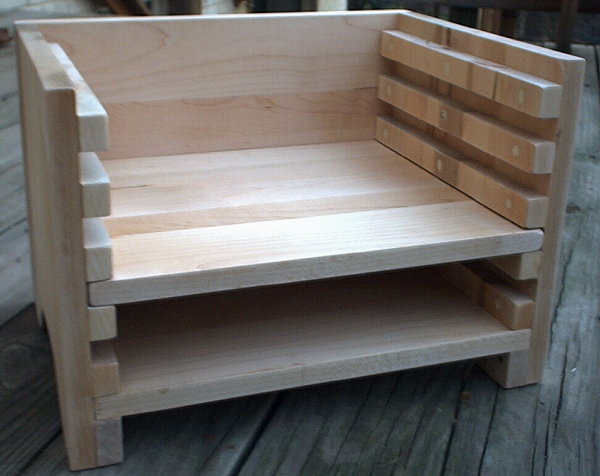
Completed foot
rest:
|